

What's changed: Expanded content (added diagrams)
2.1Creating, Cloning, and Remotes
To start a project, you either create a new repository or copy an existing one to your machine.
■ Create and clone
• Create new = via "New" at the top-right of GitHub, or locally with git init. When creating on GitHub, you can add a README, .gitignore, and LICENSE at the same time.
• Clone = copy an existing repository with full history using git clone <URL>. This automatically registers the source under the default remote name origin.
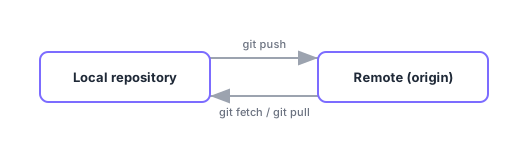
■ Remotes and syncing (see the diagram)
A remote is a named reference to where a repository is stored. You exchange commits between local and remote.
• git push = send your local commits to the remote (upload).
• git fetch = download the remote’s latest but do NOT integrate (merge) into your working branch.
• git pull = combine git fetch with merge (or rebase, by config) to bring your local up to date.
It is safer to fetch first, review, then integrate.
■ Initial files
• README = the entry-point description of the project.
• LICENSE = the terms for using, modifying, and redistributing the code.
• .gitignore = a file listing files/patterns to exclude from tracking, such as build outputs, logs, dependency folders (e.g., node_modules), and secrets—preventing accidental commits of unwanted or dangerous files.
Sign in to track progress — Log in.
Quick check
(just a quick review)Q1. Which command clones an existing repo locally with history?
Q2. Default remote name set right after cloning?
Keep track of your progress
The full study guide is free to read. Sign up free to practice with the question bank, track what you have read, review your mistakes, and highlight passages.